My last day in Sydney was pretty much packed with activity. In the morning it was off to darling harbour and the sydney convention centre for the Good Food and Wine Show. We went there with high hopes, but were a little disappointed by the few number of quality booths, with quite a few of them marketing ready-to-eat/ instant foods..even down to instant duck and instant noodles. Anyways, it was interesting nonetheless - very similar to some of the large scale fairs that we have back home. There were also live cooking demonstrations. That is one hell of a familiar chef..I saw her show on YouTube before, but I just can't remember her name for nuts.
Picture
A sunny day with a beautiful view to boot at the harbour: ferris wheel (with nobody riding on it)
Picture
Browsed through Paddy's market...
Picture
Had yum cha at Zilver and had a "behind the scenes" exclusive at the Intercontinental, before heading off to a stroll at The Rocks weekend market and ending on a sweet note with some fluffy dessert pancakes at Pancakes on the Rocks.
Picture
Picture
To everyone that has been following my blog, thank you for reading. To my chefs at Le Cordon Bleu, thank you for all your guidance throughout the past 9 months. To my fellow patisserie classmates and friends, good luck and may you find joy working in this industry. Goodbye...
 
All good things come to an end..and here I am at the end of the first stage of my dreams.

We had a great time on Friday with Chef Joseph, making a delicious flourless chocolate cake and equally yummy orange ricotta filo rolls. My god..the ricotta rolls are super yummy both baked and fried..totally addictive snack! My plate-up:
Picture
I'm also happy that on the 4th attempt since I entered this school, I finally managed to get feet for my macarons..ok, practice does help..
Picture
And I made another marzipan figurine for chef gert..
Picture
Last day of school was an immensely satisfying lesson on sugarwork, where we produced a small sugar showpiece. Chef Gert made a lovely piece during demo:
Picture
In class, I thought it would be difficult, as it was only our second lesson working with isomalt/ sugar. But everyone still managed to produced a showpiece in our class. :) I made one with a little bird's nest.
Picture
Picture
Picture
a) Poured sugar: the base is made simply by colouring some melted isomalt and pouring it into greased cutters to set. I only swirled the colour partially in to get a textured finish. Pouring sugar produces a glass-like finish.
b) Blown sugar: the bird is made using a sugar pump where we pump air into a round of isomalt to blow it up into desired shapes.
c) Pulled sugar: the rest of the piece is made by pulling the sugar, which produces colours with a metallic sheen finish.

The good thing about using isomalt is that the showpiece can be kept for ages and it doesn't melt etc, but the bad thing is that it loses its shine real fast (like in a couple of hours you can say goodbye to the shine). Anyways, a great lesson to end my journey at LCB, I must say.
 
Week 9 marks the end of my 9 month journey at Le Cordon Bleu, and the start of an exciting work life. :)

Last weekend and Monday was spent finalising the components of my exam gateau. We had to create an original gateau for our exam in 4.5 hours and for me, this task really made me shift away from the mindset of just blindly following recipes, and instead fine-tuning the ingredients and amounts until they achieved the texture and taste that I wanted. I made this trial cake for Chef to try on Monday. The flavours worked beautifully but sadly my pistachio mousse leaked down the sides because not having a blow torch at home, I placed my jaconde in the grill to caramelise it..but it ended up shrinking, leaving many gaps for the mousse to seep through.
Picture
But not to worry..have faith..and I did because I had practised this cake many times at home and made sure that my workflow and everything was right. This is what I made for my exam on Thursday, and I got top in the class for my cake..I'm over the moon. Make that doubly over the moon and the stars since I also had top marks for my theory exam. :)
Picture
Picture
Picture
I named my gateau "Ruby's Secrets" because of the hidden strawberry jelly layer inside the gateau..this strawberry jelly layer was an addition made just a couple of days before my exam, many thanks to chef joseph who suggested that I put it in. It works really well because the praline and pistachio mousse is on the sweet side, the chocolate meringue and pastry cream made using cocoa powder gives a slightly bitter kick and the strawberry jelly balances the taste perfectly with its tangy taste.


Making the strawberry jelly was an interesting process. Initially during my trial runs I pressed the berries through a sieve to get fresh puree, but it took really long and I wanted a tool that was simple and efficient without having to use a stick blender (only 100g of strawberries)..so off I went for a walk around town..and I found the magical garlic crusher that would solve all my troubles..and it only cost $2.50. It did a wonderful job in the exam and it only took 10 minutes to get my jelly done. Well done garlic crusher!

Anyways, to relax before the exam I made some sugar figurines for my chefs and my friend's birthday.
Picture
Picture
Oh yeah..betty boops haha..well, I only made it because we had gone to Singapore's newly opened Universal Studios during the last holiday and snapped a photo with a life-sized walking Betty Boops..and it was something memorable that we both enjoyed.

Ok, that's all for now, check back soon for more!
 
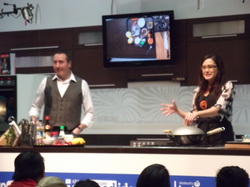
I used to drink coffee with my dad when I was a kid, and I loved it. Over time however, I developed a preference for tea..ok milk tea to be exact. But both coffee and tea are good money spinners anyway if you're running your own business, so it was a good experience learning how to prepare various coffee types during our coffee lesson.
Picture
Picture
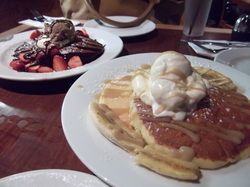
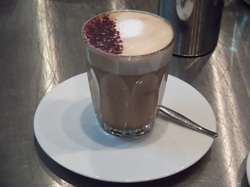
I made the flat white above for our mini test at the end of the lesson. Chef said it's good but me, not being a coffee conoisseur of any sort, I just took a sip and down into the sinkhole the rest went hahaha. Didn't  feel like drinking coffee that day.

Anyways we worked hard on producing a range of high tea items for two tea sessions that were open to public and chargeable. We also had to do front of house during the session, which I didn't like too much..I prefer being in the kitchen.
Picture
The three-tier tea stand - ready for service.
Picture
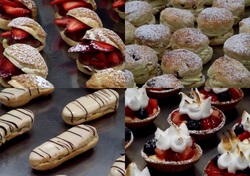
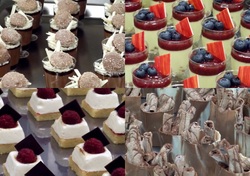
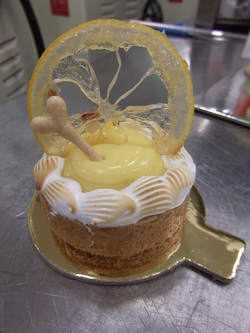
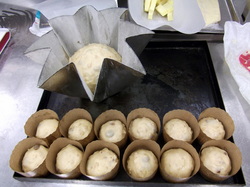
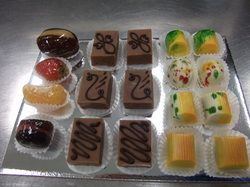
Clockwise from top left: Choux buns with crunchy cookie crumble topping, filled with chocolate mousse and fresh strawberry slices, date scones with double cream and raspberry jam, lemon tartlets with fresh fruit and caramelised Italian meringue, coffee eclairs.
Picture
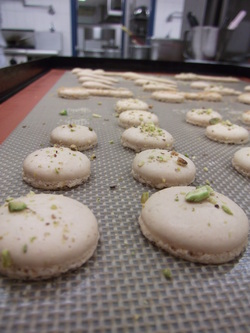
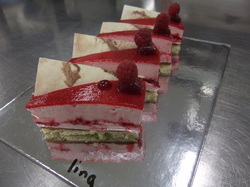
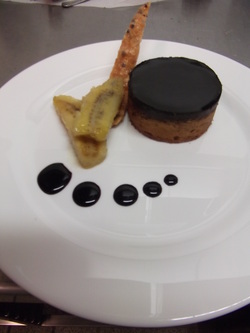
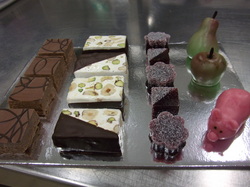
Clockwise from top left: Dark chocolate mousse with white chocolate shavings and coconut-chocolate macarons, pistachio brulee with strawberry jelly, mini gateau concorde drizzled with dark chocolate sauce, breton with caramelised creme chibouste and fresh raspberry.
Picture
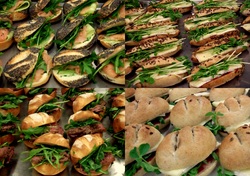
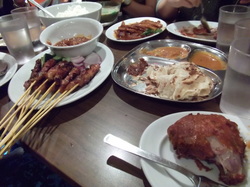
Clockwise from top left: Poppyseed soft rolls with cream cheese, cucumber and smoked salmon, linseed vienna with cranberry sauce, brie and pea sprouts (2 versions), baps with wild rocket and roast beef.
Picture
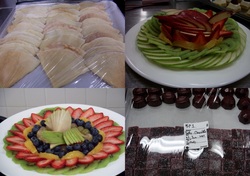
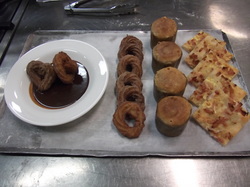
Clockwise from top left: Crepe suzette, fruit plate (2 versions), chocolates, fudge, and jellies. I did the fruit plate with the apple swan carving during the second week of tea service, because I did the fruit plate in the first week as well and thought it looked kind of boring. So I went onto YouTube to get some ideas and learnt how to do a simple swan using an apple..and off I went to buy a red delicious apple for my fruit plate (because the school did not provide apples in the mise en place lah..)
Picture
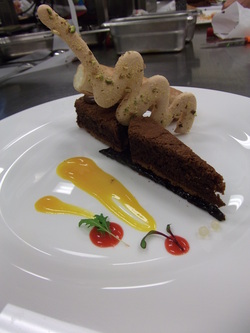
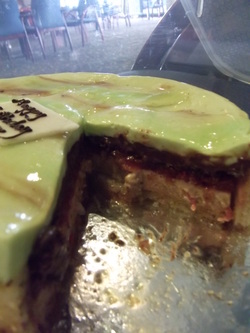
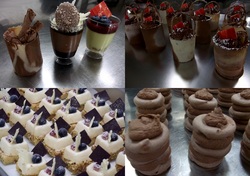
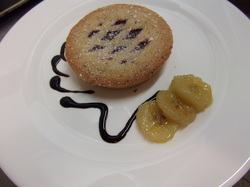
Another version of breton with caramelised creme choibouste, topped with blueberries and covered with chopped pistachios at the bottom left, and another version of mini gateau concorde at the top right. I made this version of concorde and I'm really excited and happy about it. Just looking at this picture makes me feel so happy because I learnt alot from making this mini cake. We first assemble the cake as you can see at the bottom right - with cocoa meringue discs and chocolate mousse. Then we cut out strips of untempered marbled  chocolate (chilled to set and then brought back to working temperature) and wrap it tightly around the meringue and mousse, before garnishing it with little meringue batons and a dusting of cocoa powder and icing sugar. I also decided to put on a little handle on each gateau to make it look like a mini parcel that could be carried..Chef said it was very nice..and then he gave me some red chocolate pieces to complete my amateur masterpiece hahaha. Thanks Chef!

I thought high tea for two weeks would be a little boring at first, but I think it was a good experience because we got to re-enact hotel/catering production albeit on a smaller scale.

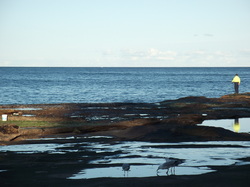
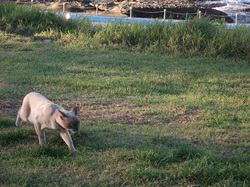
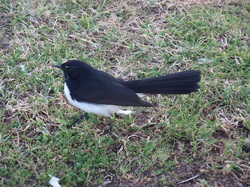
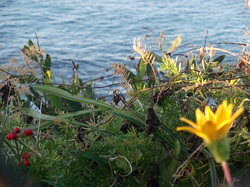
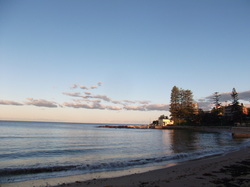
The weather wasn't too bad either..unusually "hot" for winter, hot enough that a group of us actually went for some gelato along the Dee Why beach, and watched a cat chase after a little bird that couldn't really fly. We were trying to distract the cat by making noises so that the poor bird could escape away from it. An old man sitting near by also helped to chase away the cat. Thank god the bird got away.
Picture
Picture
Picture
Picture
Picture
Next week: Final Practical Exam and the last week of school!
 
This week we had a trial run for our exam gateau, where we have to create an original gateau with a given list of ingredients. I made a pistachio mousse (using pate a bombe base) and praline diplomat mousse gateau, with a layer of cocoa meringue inside and surrounded by a caramelised rum sabayon jaconde..
Picture
 I actually practised it 3 times at home and adjusting the recipes before doing the trial run at school, because I did not want to waste the school trial run. At home, I put the cocoa meringue right on top 'cos I wanted it to remain crunchy, and I also piped some praline paste on top of the mousse, which is that brown stuff you see coming out of the cake centre below. But 'cos i had to glaze the cake in school, I sandwiched it in between the mousse layers instead, which I don't really like to do because the meringue goes soft quicky as it absorbs moisture from the mousse. Anyways, most students just had one chef in the kitchen to try their cake, but I felt it was a pretty subjective view just hearing from one chef, because everyone has different tastes. So I went to other kitchens as well and asked 3 chefs to try my cake..two of them liked it but one of them didn't like the pistachio and praline combination..so I will try another combination this weekend maybe, and see which one tastes better..
Picture
We also did sugar work this week, working with isomalt (a sugar substitute)to do poured and pulled sugar decorations. I made a flower which I'm really happy with as it is my first time. We do this by cooking the isomalt, adding colour, then leaving it under a sugar lamp to keep it pliable so that we can pull it to the shapes that we want. Then we use a spirit lamp to weld the pieces together. Super smart me - first time I used my sugar gloves, I took up my mini scissors to snip off my flower petal, and happily snipped a hole into my gloves as well. Goodbye to my hundred of dollars worth of sugar gloves..but not to fear..we can also buy the cheap laundry gloves from the supermarket for $2.
Picture
Picture
Armed with the sugar flower and a block of marzipan and ready to roll icing, we made a celebration cake out of a super dense and moist fruitcake which we baked on Thursday. I made a wedding cake with my RTR wedding couple made earlier on. Actually I was going to match it with a royal icing bicycle but alas, my heart broke when it shattered into a million pieces when I was about to put it on my cake.
Picture
Picture
Picture
It's a modern wedding cake where the guy holds on to the girl instead of the other way round! Heh, actually, the groom was a little wobbly so he had to hold on to my sturdy bride for support. Chef was worried that my groom would fall down haha.

This week's work was interesting and I enjoyed it a fair bit. And Chef Gert showed us a super lovely wedding cake that he made..I'm totally bowled over by the 3D royal icing carriage with the horses and the extensions..really really impressed..the royal icing is extremely fragile and it takes considerable skill and patience to assemble a masterpiece like this.
Picture
Thank god we can finally return to our usual well-lit kitchens..working in the dim kitchen 14 for the past two weeks wasn't the best of things.
 
I'm sitting in my bed, having a cup of hot oatmeal for dinner, thoughts are running through my head, and I suddenly realise that thoughts are like mise en place..thoughts set the stage for the decisions that we make in life, just like how we prepare our ingredients and equipment to bake our pastries.  I came to this "epiphany" of sorts because I was, well, reading a book on the fundamentals of baking science. In baking, accuracy, well-calculated combinations and balance of ingredients, and a sound understanding of their properties give rise to a good product. Similarly, rational, logical thoughts give rise to good decisions being made, while those random whirlpools of thought tend to result in less than desirable outcomes.

That aside, I did real mise en place for my fruit cake lesson this coming Thursday and Friday. We're going to work with icing for decoration to create a cake for a special occasion. I've decided to do a classic - the wedding cake..and I foresee there isn't going to be enough time to do all the different decorations in class, so I did my bride and groom figurines at home first.
Picture
Picture
Picture
These were made using RTR (ready to roll) almond flavoured icing which I bought from Woolworths. RTR icing is great to work with because it is so much easier more pliable than marzipan, and it dries out quite slowly, giving an amateur like me more time to play with. (It's also quite yummy actually..I had a taste before I started work on my figurines..and of course the high sugar content gave me the much needed energy to sustain my 5-hour marathon to make these figures.). The body parts are stuck together with water and spaghetti sticks, while the icing is simply coloured with water-soluble food coluring.

Overall, I'm quite satisfied with what I made, except I noticed that I had made a black shirt instead of a suit for my groom only after I had finished. And for my bride, she was meant to have a smaller upper body and a longer, more voluminous skirt. And she was meant to have long hair..but after I made the wig and put it on her head it wouldn't come off haha..so she was destined to have short hair..)

I hope to make a bicycle with royal icing to complete the cake and maybe some pulled sugar wedding bells..hopefully it will be good..
 
This week was busy. We visited Continental Patisserie's central kitchen where we were given a tour of the premises and an insight into volume production. Like this.
Picture
They didn't give us anything to sample anyways, so that left us sad and hungry, so we went for a little asian feast ourselves at Mamak in the city, then we trooped to Chef's Warehouse where I bought myself two bavarois moulds.
Picture
This week's lessons focused on making individual desserts. We made raspberry cheesecake on the first day, consisting of a scottish shortbread base, a thin layer of crunchy royaltine (made with praline paste, scottish shortbread crumbs and melted chocolate), raspberry marmalade, raspberry cheese filling and raspberry mirror glaze. That's cake for you in the modern pastry scene. Combinations and layers, so unlike the good 'ol straightforward "everything into the oven to bake" teacakes of yesteryear. Sadly, our marmalade failed to set, we were late putting our cheesecake into the blast chiller and it did not set properly in time for presentation. It was a disappointing day.  The saving grace was my chocolate piece, which I made with some colour gradients using cocoa powder and some brown colouring.
Picture
The second day we made lemony stuff - pistachio macaron with lemon diplomat and a citron tart filled with lemon curd. In all honesty, I hate lemon. Lemon zest is nice when it's addded to sweet pastry, but oh man, lemon cream and curd? I love the colour but count me out. Anyways, chef said I made a good lemon tart..I liked my presentation too. But I wasn't happy with my macaron because I undermassaged the mix, hence it was a bit stiff and didn't develop nice feet when resting.
Picture
Picture
Saturday..I had to join another class for practical due to school renovations and clashes with my work schedule. A little apprehensive but I must say actually that after the lesson, it was a nice change working with this class instead of my usual class. This class seems to be less competitive..between our two classes, it is a well-known fact that our class is faster..it is good to be in a class where the output is of higher quality because you get to learn more, but I feel that it is also very important that in one's strive for excellence, we must not forget to maintain an attitude of helpfulness. Today's atmosphere made me feel very happy, and I like my cosy little workstation where I produced a linzer tart and chocolate banana tart with almond and cocoa nib tuille in good time.
Picture
Picture
Because we made the soft version of Linzer tart dough, the whole tart had to be piped, including the lattice pattern on top..that was fun. I also liked the almond and cocoa nib tuille but the recipe made a rather oily tuille. It is made in a similar way to nougatine and has the taste of a super-thin florentine biscuit or nougatine, but it behaves like a tuille 'cos you can manipulate it into shapes when it is still hot out of the oven. I did a spoon but alas it broke when I took it up to plate my desserts haha. So I settled for a wavy tuille piece instead and some caramelised banana strips. This tart is made using cacao berry 66% mexique, which has a really sharp taste but in my opinion it totally masks the flavour of the caramelised bananas inside the tart. I'd prefer a caramel banana and muesli tart anytime.

So this week was pretty good I must say. I also saw a rainbow and a nice sunrise during my walk to school.
Picture
Picture
Looking forward to next week's lesson on decorated fruit cake and a little nervous about practice session for our exan gateau. Hope chef likes the combination of flavours I chose to make my cake with.
 
This week was (ignoring the ominous presence of chocolate on day 1) the best so far. That is without a doubt because we got to make bread. Every semester I'm always fervently looking forward to the few scarce lessons on breadmaking, because I love bread - both making and eating it. I love the smell, the starters, the kneading, the proving, and just simply squatting by the oven and watching them transform into these beautiful loaves.

Ok, so the week started off with chocolate, which wasn't really too good..I've developed a little dislike for both making and eating chocolate ever since I took up this course..still ok with dark but totally put off with milk and white..but we have to complete the task since it is part of our lesson.

Chef did one with a chocolate rose in demo, which was really pretty. I did my decorative piece by spreading some colour and white chocolate on a crumpled piece of silicon paper and curling it up like a fiery wave. I also got Lucile, my French classmate to teach me some French so that I could write "avec tout mon amoun" on my box, which means "with all my love". I should have made my decorative piece smaller so that the outline of the box would be more visible..occured to me only after I made the piece, so I did not try to push my luck and trim it for fear of breaking the entire piece (as I had only made one).
Picture
On day 2 we made panettone, a sweet Christmas yeast bread which originated from Milan, Italy, and left it to ferment slowly overnight.
Picture
Ditto for the biga starter which we made a day ahead for our ciabatta lesson. And we made Bienenstich aka Bee Sting, which is a German sweet bread sandwiched with mousseline cream and topped with a crunchy almond and honey crust. A myth goes that it was called bee sting because when the baker made the bread, a bee got attracted to the honey topping, flew over and stung him. This bread is quite nice..it is rather moist and soft, and not overly sweet (but don't be fooled it has alot of calories from the buttercream filling).
Picture
Picture
Day 2 ended exceptionally well as Chef Joseph is one awesome chef and he made some amazing sourdough bread with olive oil and vinegar during class for us to munch on at the end of the lesson. It was super yummy with a crusty exterior and a nice, soft crumb inside.
Day 3 was a wierd day of sorts, because we had to go to a new kitchen due to ongoing renovations. It was 2 floors down out usual haunt, tucked away in a small dark corner, with really dim lighting to complete it all. We baked our panettone, deep fried our churros and baked 'em lovely ciabattas, making a tarte flambe with the leftover ciabatta dough (the tart's basically a dough baked with creme fraiche and sweated bacon plus onions).
Picture
Picture
Traditionally, the making of ciabatta (Italian slipper bread) is a long process so that the bread can develop a good flavour as well as better/ lighter crumb structure.

Anyways, within the short period of class time that we had, we still managed to produce some of this awesome bread. I love how there is a rather special technique to handling and shaping this bread..the key is to be patient and gentle..no kneading on this one!
Picture
Picture
Anyways, by far the best part of today was tasting the wonderful german stollen. Though it was only for demonstration purposes, we got to try the bread and it was just awesome, especially with the homemade marzipan inside..yum yum..
Picture
 
I did a crazy thing last week. Guess what? I walked home from Rozelle after work - a total of about 10km. Of course I kindly treated myself to some energy boosting pastries on the way, with a walnut irish soda bread roll from Bowan Island Bakery and an almond croissant from Sunny's Hot Bread Shop. Both tried and ticked off my list of patisseries/bakeries that I wanted to visit. Bourke St Bakery still ranks number one.

I was also extremely productive over the weekend, finishing all my assignments for the school term, and testing out my self-created gateau for the exam twice - that set me back by a considerable amount of money, having to buy the cream, super expensive almond meal, pistachio and praline paste etc.

Alright, off to work. Maybe I'll take a break this weekend..just sit down with a nice cup of hot tea and my newly borrowed bread science book from the library.
 
Right. If you think my mood ain't so good right now, you're spot on. That's because the internet hanged right after I typed my post for week 3. Now I have to retype and maybe the feelings that I put in the previous post would've been lost.

Anyways, this week was a sweet affair where we made lots of confectionary and petit fours. Only two things caught my attention. The first one was the colouring of moulded chocolates. Chef showed us how to use cocoa-butter colouring/ paste, luster dust and transfer sheets to design our chocolates..all these used properly really makes a chocolate go 10 notches up in term of appearance. I especially loved the copper luster dust which gave my yellow-coloured chocolates a lovely orange hue with just a very light dusting. I think the hue can't be seen from the photo but it's the two pieces in the bottom right hand corner. The fudge and caramelised marzipan/ fruits were the other part of the lesson which I didn't like because I think caramelised fruits are more for display rather than consumption (the caramel is horrible and too hard and sticks to your teeth, and the fudge is way too sweet).
Picture
The second thing which got my attention was marzipan modelling. Chef Joseph asked me during class whether I liked marzipan modelling, as I previously did prince and rapunzel for my croquembouche, an elf for my buche de noel, and most recently a piglet on top of the fruits that we were supposed to model. I said no, but I kept thinking about it when I got home..I'm not sure whether I like it, but it's just that I find it therapeutic and really satisfying when I complete a figurine. Maybe I need to take up a course on this when I've saved up enough money again. Anyways, during modelling, we got to use the spray gun, which is a totally awesome tool! It makes the stuff look so real..check out the red spray on the pear and apple..the right technique is to hold the spray gun at a distance from the fruit and spray so as to get a thin, even colour coat. My only complaint? THE GUN IS NOISY. Hahaha.
Picture
From left to right: That's the Gianduja on the left, which is pretty similar to fudge, except that it is made up of chocolate, praline cream and paillete feuilletine (pronounced as pie-teh fil-tin - puff pastry crumbs). Second, nougat montelimar - which is a soft nougat hailing from the city of Montelimar in France. And third, Pate de Fruits - French for fruit jelly. This jelly was gelled using a combination of yellow ribbon pectin (a citrus-based halal alternative to gelatin, made from plant cell extract) and tartaric acid (to activate the pectin).

Alright. Off to do my assignments. I'm gonna complete all in the next two days so that I can concentrate on planning for my exam gateau and theory.